You are on the modules page. Click on the “LOBSTER” module.
You are on the trip register page. The register is divided into 3 sections: Opened trips, Closed trips and Sent trips. To create a trip, click on the “ADD TRIP” button.
Page 1 provides general trip information. Some information is filled in automatically from your settings, but you can modify it if necessary.
This is the case for the Crew register. If one of your helpers is absent, you can delete it by clicking on the “REMOVE CREW MEMBER” button. It will only be deleted for this trip.
Answer the question “Will you be using a carrier during this trip?”. If you do transfers, answer “YES”.
When you have completed all the fields, go to the next page by clicking on the “NEXT” button.
Page 2 contains information about the DEPARTURE.
Set your departure date and time by clicking on the “Automatic clock” button.
You can change the date and time manually. On your phone, click in the time field, the clock appears: choose “AM” or “PM” then enter the start time, and click on “Set” to save the data.
The starting port is automatically filled in from your settings, but you can modify it by clicking on the blue arrow. Choose the right port from the menu that appears Click on the “NEXT” button to move on to the next page.
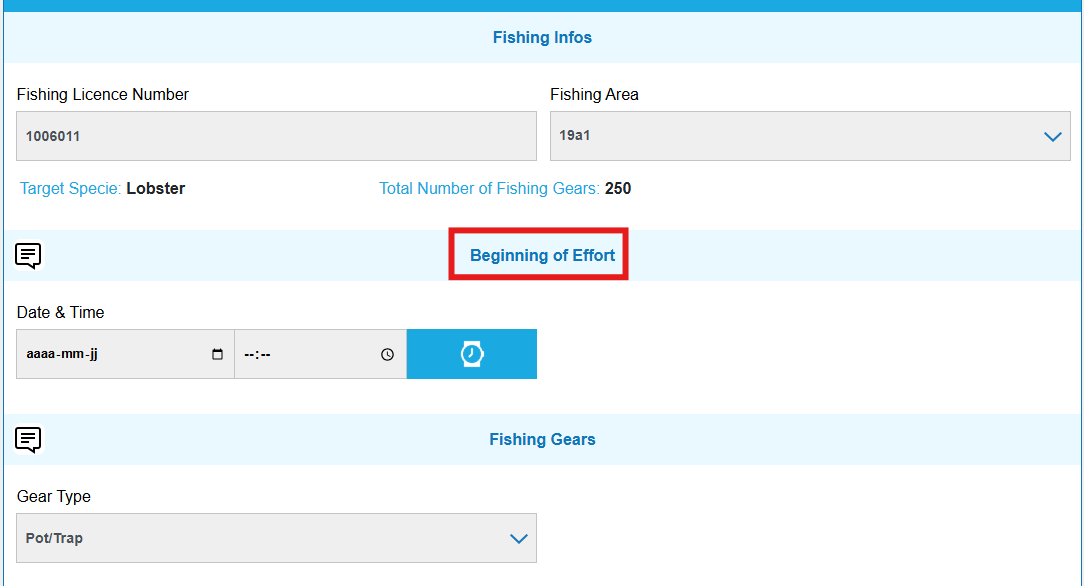
Page 3 provides information about your fishing EFFORT.
Enter the date and time of your departure by clicking on the “Automatic clock” button. You can change them manually.
The Gear type is automatically filled in from your settings.
Fill in the Effort Detail section. By default, the soak duration is 1 day, but you can modify it. The Number of gears hauled is filled in automatically from your settings, but you can modify it.
Then complete the Catches section. Enter the weight in kilos or pounds, and JOBEL will convert it automatically.
If you have Bycatches in your traps, click on the “ADD BYCATCH” button.
Select the species by clicking on the blue arrow.
Indicate the number of specimens discarded.
Depending on your region, fill in the Special fields.
If you’re making a second tow, click on the “ADD ONE EFFORT DETAIL” button and complete the information.
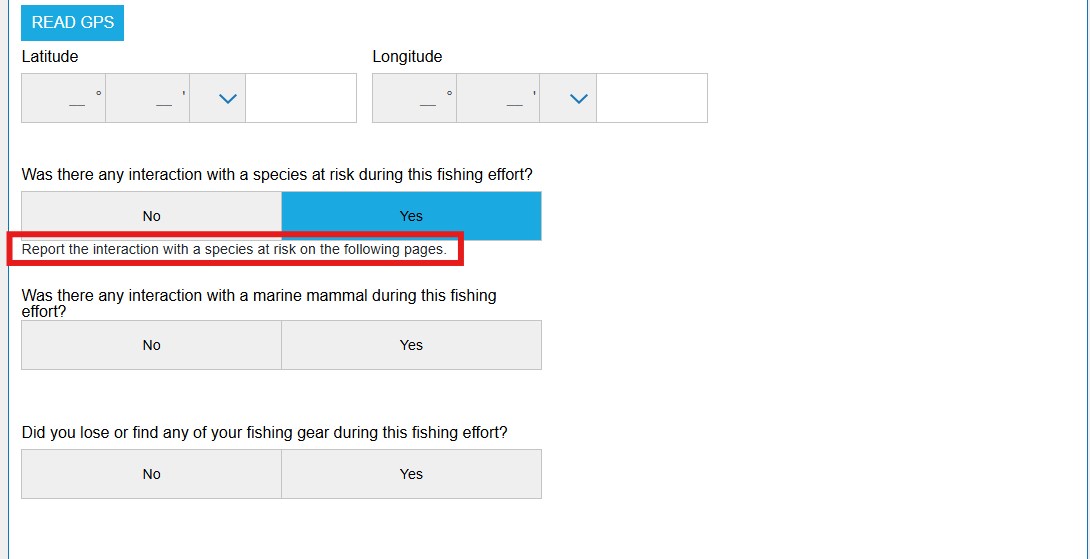
Complete the End of effort information. Click on the “Automatic clock” button to enter the date and time, and on the “READ GPS” button to enter your end-of-effort position.
Answer the questions about interactions with a species at risk, a marine mammal, and whether you’ve lost or found one of your fishing gear.
If you answer “YES” a message appears asking you to complete the form that will appear on the following pages.
For the period of inactivity, consult your fishing license to find out if you need to complete this form. (See our visual guides on how to declare interaction forms and lost/found gear).
Page 4 concerns the Bait section. The bait type is filled in automatically from your settings, but you can modify it by clicking on the blue arrow. Complete all fields.
If you are using several baits, click on the “ADD BAIT” button as many times as necessary, fill in the information, then click on the “NEXT” button.
Page 5 provides information on ARRIVAL: the transfers section, personal consumption and the landing start date and time.
If you answered “YES” to the question about transfers in the settings, and “YES” to the use of a carrier boat on page 1, the sections are displayed automatically. Transfers section only concern 17B area in Québec.
Fill in the fields requested on the carrier loading.
Complete the fields for the Transfer section.
You can add as many transfers as you wish by clicking on the “ADD A TRANSFER” button.
If you keep catches for personal consumptions, please indicate this by clicking on “ADD PERSONAL CONSUMPTION”.
The section appears, select the species by clicking on the blue arrow, then enter the estimated weight you keep. Repeat the operation if you have a second personal use by clicking on the “ADD PERSONAL CONSUMPTION” button.
Enter the Landing start date and time by clicking on the “Automatic clock” button. You can enter it manually as explained above. The port of arrival is filled in automatically from your settings, but you can change it by clicking on the blue arrow.
When you have finished filling in the pages of your elog, click on the “REVIEW” button.
You will be taken to the Trip data page, which summarizes all the information you have entered. Check that all the data you have entered is correct, as you can still modify it.
If you have made a mistake, click on the “EDIT TRIP” button at the bottom of the page.
You are redirected to the first page of the trip. You can go directly to the page where you need to make a correction by clicking on the numeric strip at the top right of the screen, or by clicking on the “NEXT” button at the bottom of the page.
If, for example, you have made a mistake on the estimated kept weight of lobsters, go to page 3, make your correction, then click on the “NEXT” button to go to the last page of the trip (page 5). Click on the “REVIEW” button to return to the data page.
If your trip information is correct, click on the “CLOSE TRIP” button.
A message appears to confirm your trip is closed. Click on “YES”.
Your trip is now closed. Click on “OK”.
Your trip appears in the CLOSED TRIPS section. Click on “SEND” button.
On the trip data page, click on “SEND TRIP TO DFO” button.
The message “Trip being sent to DFO” appears, click on “OK”.
Your trip now appears in the SENT TRIP section. A green mark indicates that your trip has been sent. To view the transmission, click on the “SEE RNBMHR” button.
The message “Plearly processed and validated by DFO” appears in the Transmission Log at the bottom of the trip data page.
The message “Plearly processed and validated by DFO” appears in the Transmission Log at the bottom of the trip data page.
You can close data groups individually for the following sections: fishing effort, bait, interactions, lost gear, period of inactivity, transfers, personal consumption. If you close them, make sure you have checked the data entered, as you will no longer be able to modify them. Example: in the Bait section, to close this section once completed, press the “Close Bait 1” button.
To return to the trip register, click on “Return to trip register”.